Procedural Pizza Generator
Making Procedural Pizza!
So, what is this?
Hello everybody, my name is Peetah (well, not actually but that's what I go by) and I am an aspiring indie game developer from...you guessed it...Italy!
For a while now I wanted to play with procedural generation, but never had I ever really overcome my comfort zone and really experimented with it. I wanted this to change.
I thought to myself: what could be both fun and interesting, hopefully simple enough for it not to take me weeks to build and that might finally project me in the universe of letting the code do things for me? Of course: pizza! Everybody loves pizza! Me included...I had 4 last week!
Anyway I decided I wanted to have the program generate a pizza for me on demand, following my requests on its size, thickness, cheesiness...mmm my mouth is already watering! So the experiment began!
The algorithm:
From Wikipedia:
procedural generation is a method of creating data algorithmically as opposed to manually, typically through a combination of human-generated assets and algorithms coupled with computer-generated randomness
I started this project also because I wanted to play around with a rendering technique called ray marching. It can be used to create a lot of interesting and visually appealing results such as fractals, but I was more interesting in the possibility to blend non-polygon based shapes and colors. It looks amazing. If you are interested in this technique I suggest you watch Sebastian Lague's video on the topic.
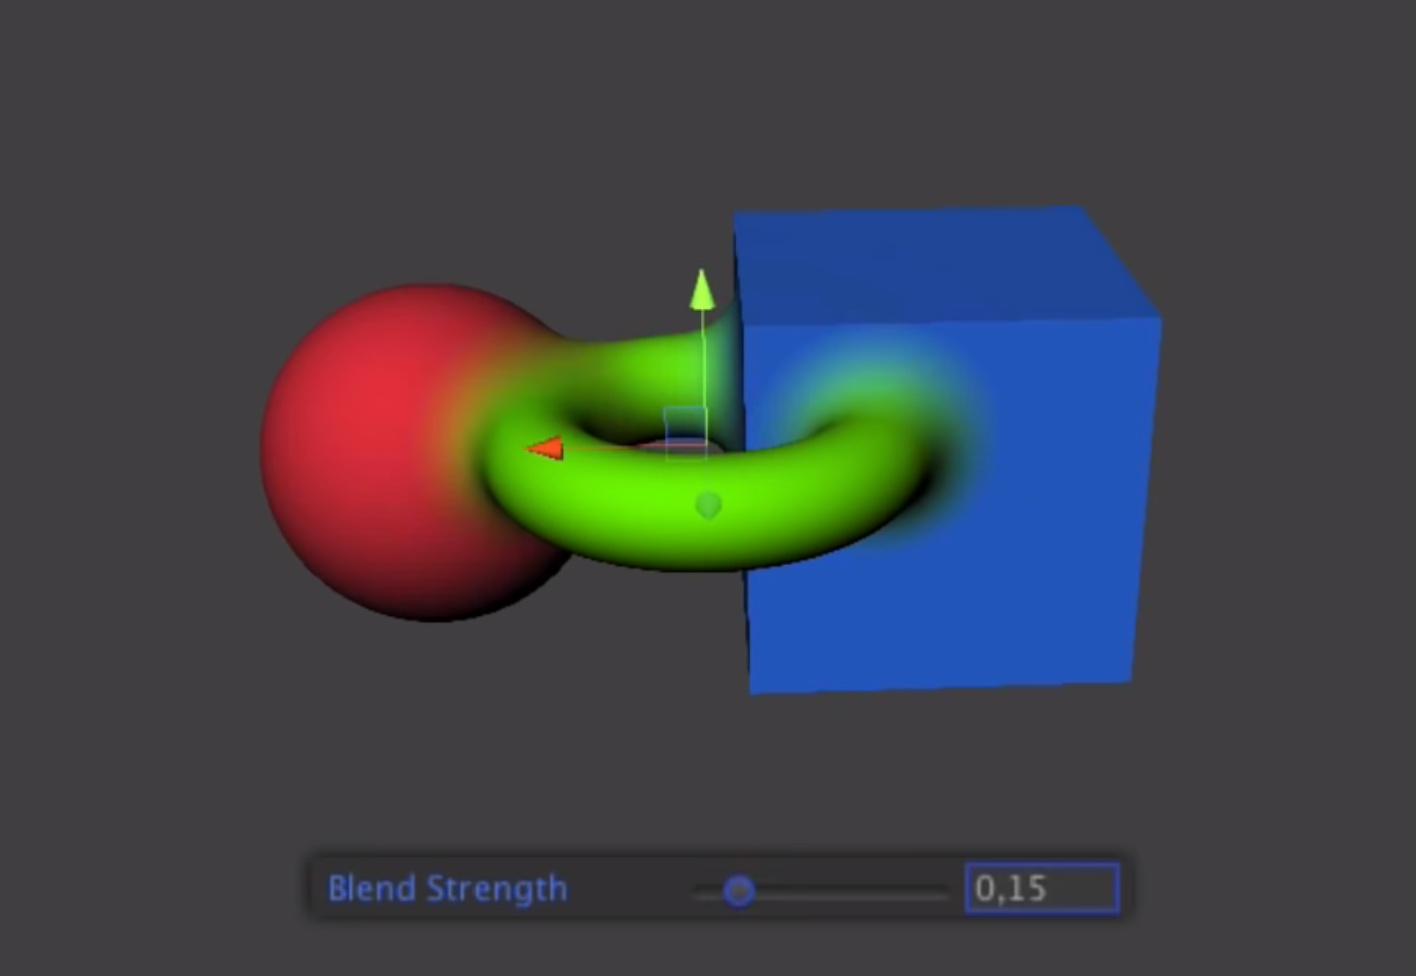
Example of shape blending using ray marching and distance estimators (credit: Sebastian Lague)
I tried this and the result were quite intriguing, but the process is quite resource intensive and requires some extra steps to integrate it with manually-made-polygon-based meshes in the scene. I could have implemented it by playing around with depth maps and what not, but I was already thinking of a new solution.
I realized that a pizza, while being per se kind of an organic shape, can actually be simplified and divided in two primitives: a torus for the crust and a circular plane for its base. These shapes can easily be produced via code since visualizing where every vertex should be is quite immediate and can be calculated in just a few steps.
The thing that I like about this (and the point of this whole project), is that I won't need to manually make a pizza model myself for any combination of thickness, radius, level of detail and what else: the code is going to do it for me!
Baking the crust:
Ah, the crust: some love it, some leave it. I just wanted to generate it without burning my own face in the oven.
As I have already stated, the crust can be approximated by a donut shaped 3D object called "torus". In computer graphics, a torus can be generated by distributing a certain number of circles (I'll call them rings from now on) along a main circumference. Then, connecting the vertices of these circles (we're playing with polygon based 3d meshes, so these circles will more likely be regular polygon shapes) we can tell the computer where to draw the faces of the model and therefore how to render the torus.
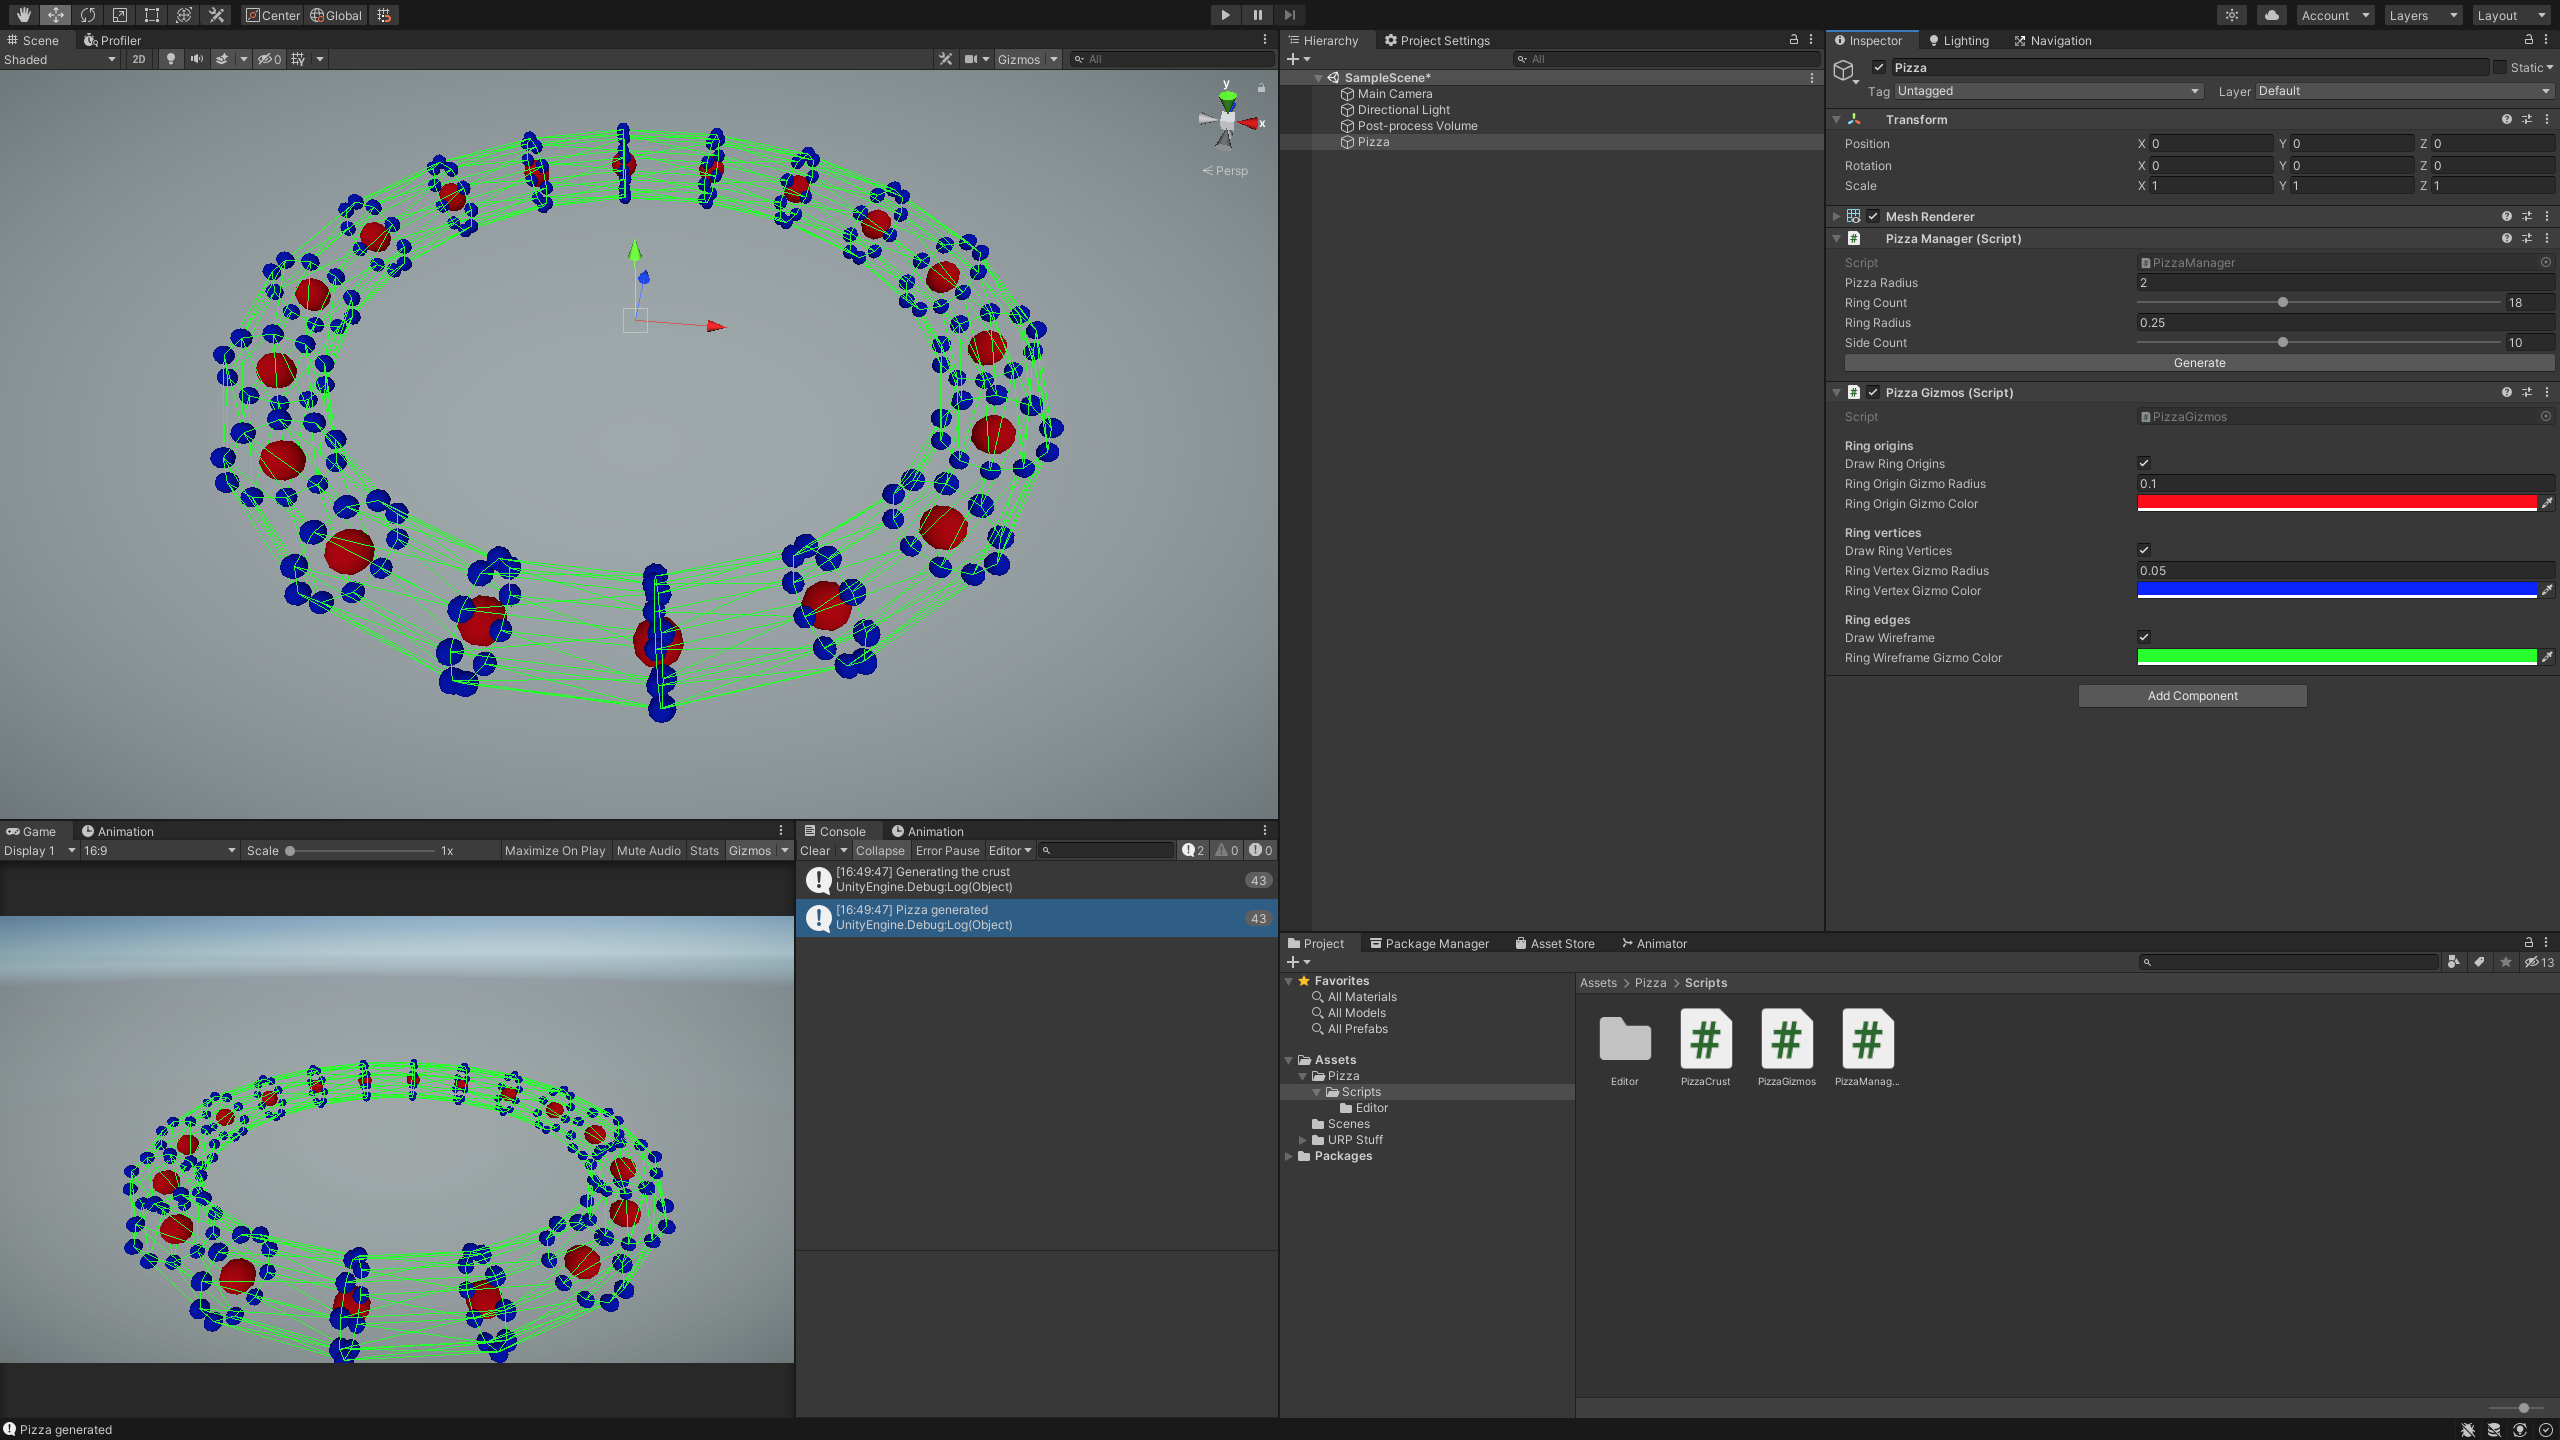
Visualization of the center of the torus' rings (red), the rings's vertices (blue), the edges that connect the vertices in order to identify the models faces (green) (screenshot from an early stage of my project).
Once I realized how to correctly connect the vertices (Unity wants me to connect the triangles in a clockwise fashion in order for them to have the normal facing the direction I actually wanted) I managed to bake the actual mesh and the torus was done.
I also decided to deform the distributions of the rings's vertices to give it a more realistic shape.
Cheesy, saucy base:
For the base, I was originally going to generate an n-sided polygonal plane based on the number of sides (rings) of the crust mesh. What I realized mid-work though is that if I later wanted to randomly offset each vertex to give it a more organic look, I needed uniform faces, that I was not going to obtain by simply getting more slices in my plane. Fortunately I found an algorithm to create exactly the plane I needed on stackoverflow and, after converting it to 3D coordinates and applying some random offset to the vertices I was done. Coloring the base and the crust with a red and "bready" tint gave me this result:
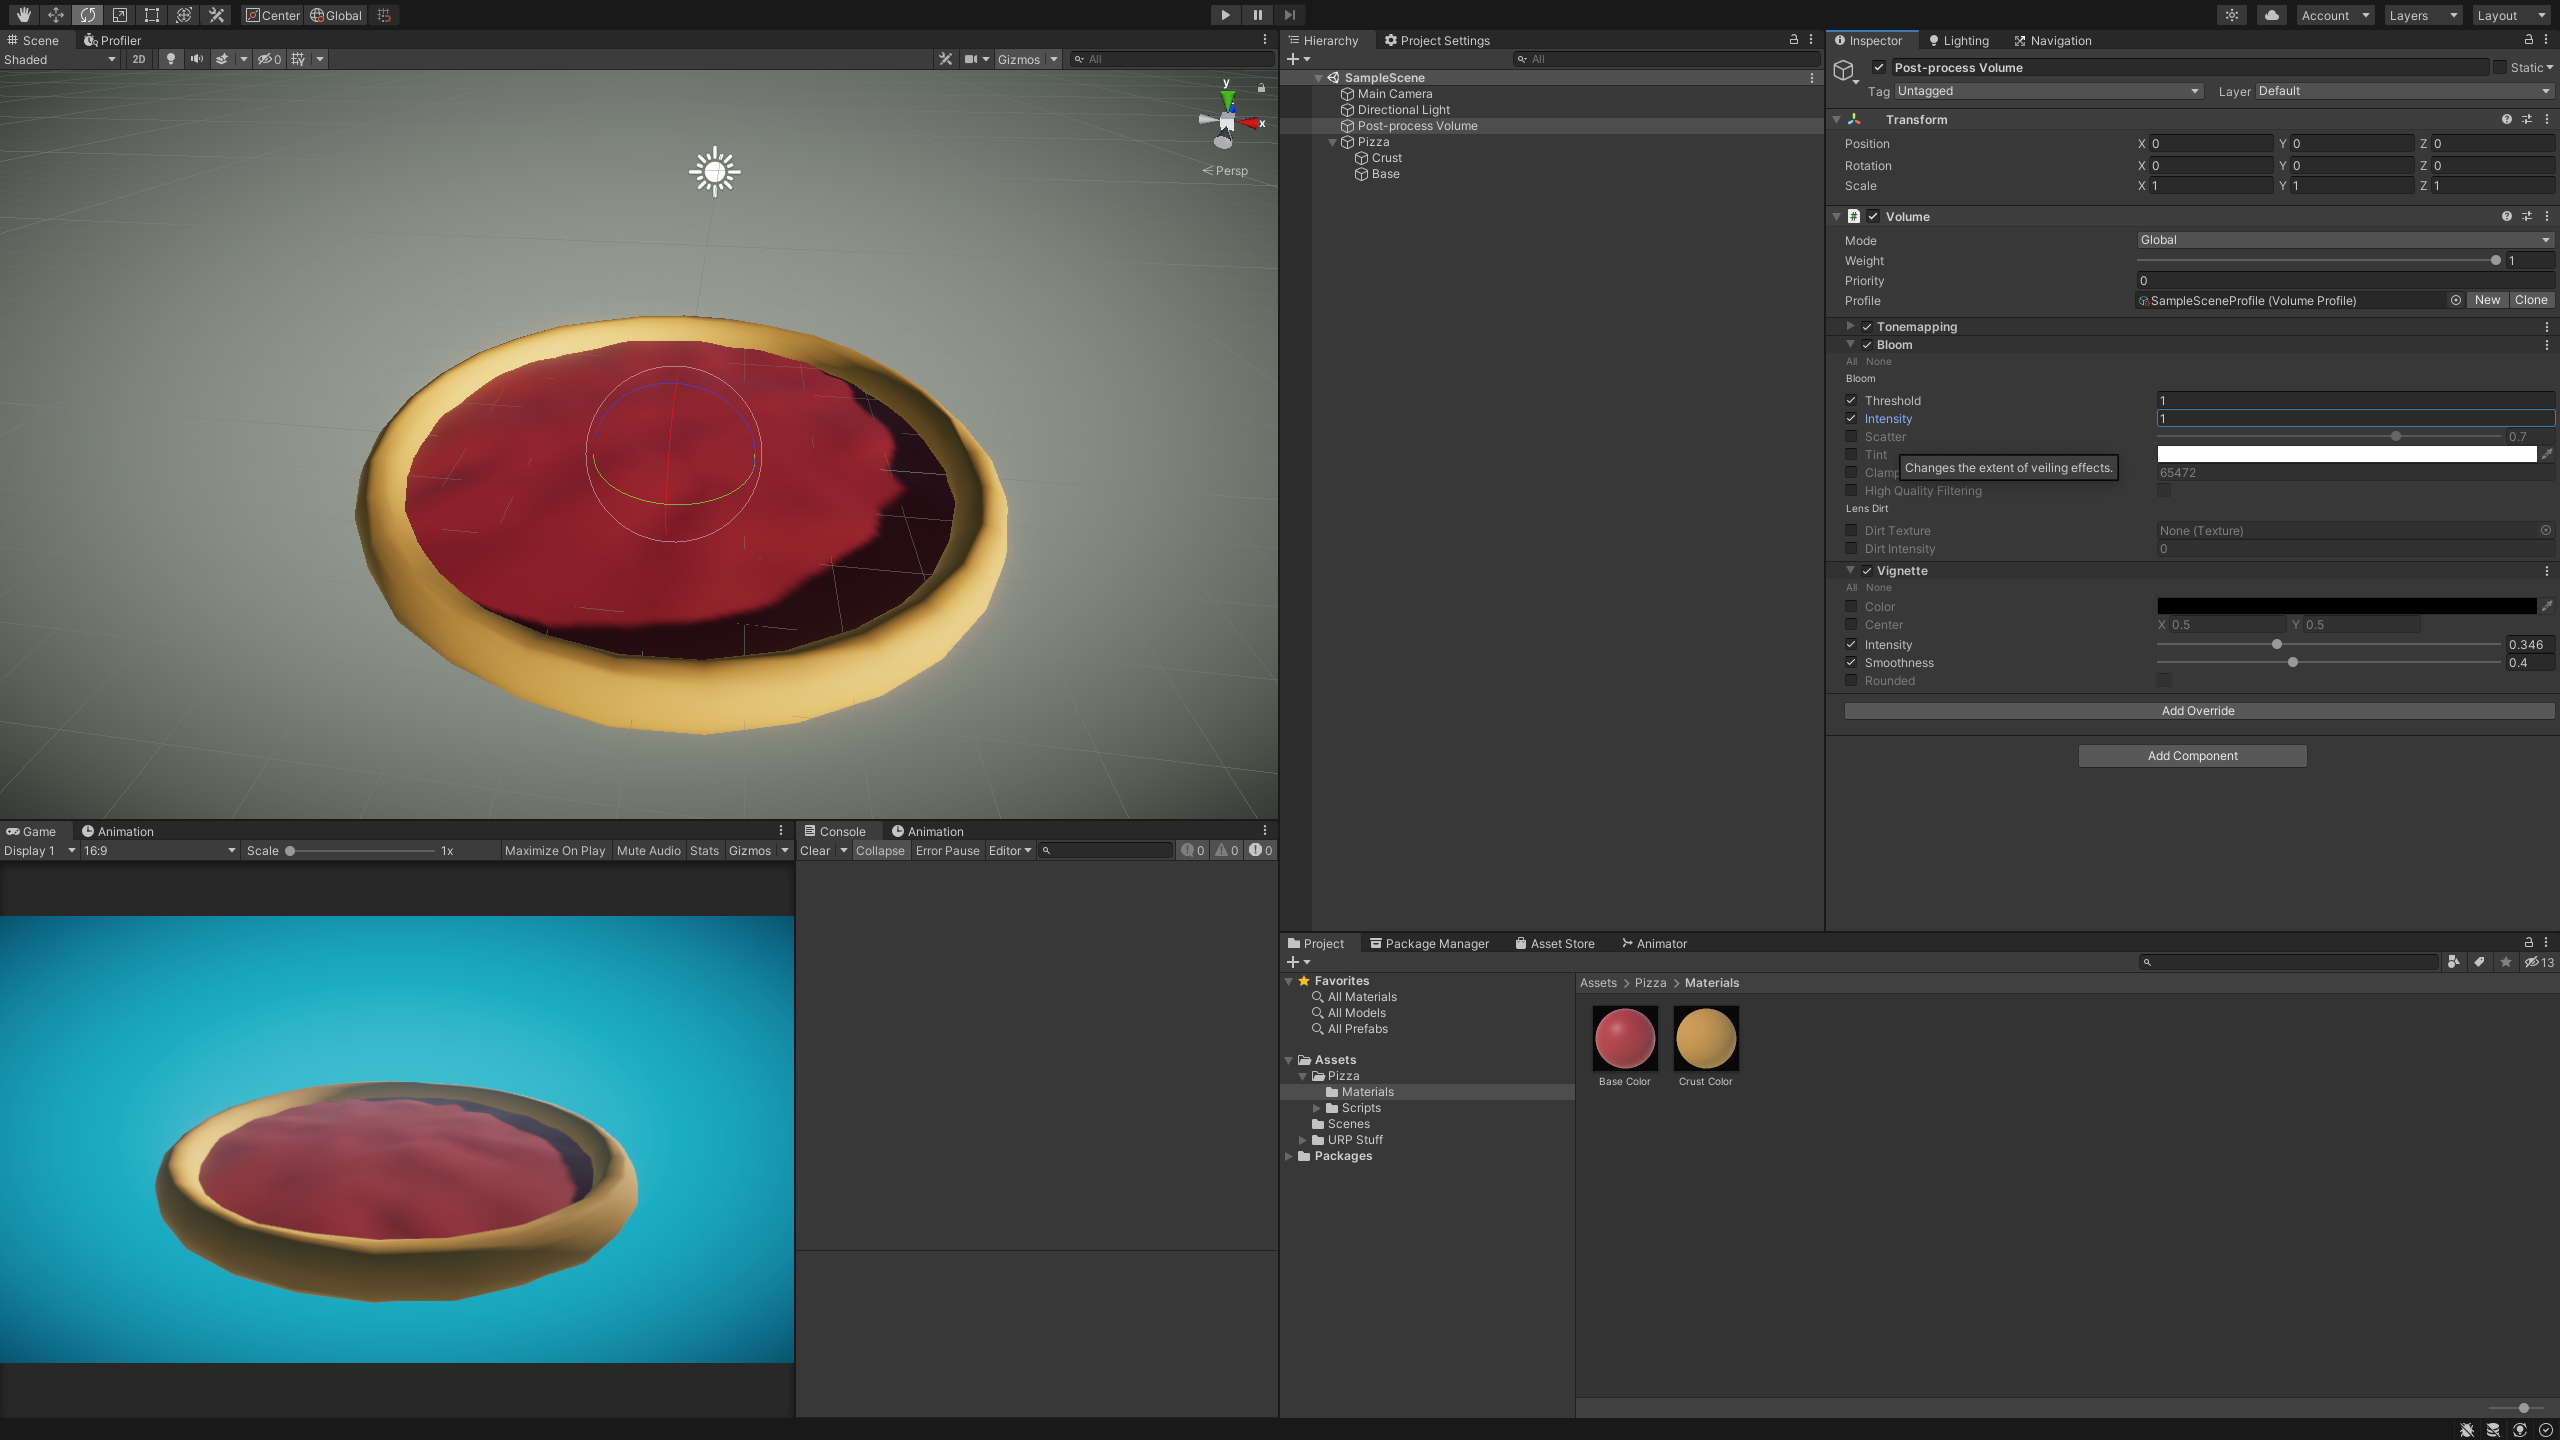
I am already happy with this result, not gonna lie
Coloring the pizza:
At this point, according to the original vision of the project, the only thing missing was a way to color the crust and the base in order for them to look a bit more realistic. Luckily I have Unity's Shader Graph at my disposal and it made it pretty quick. I could have written the hlsl code manually, but I was already using the Universal Render Pipeline so I decided to exploit the handy tools that come with it.
Noise. A lot of noise.
Shading the torus, I used the object space position of the vertices to sample a gradient and a simplex noise function, that I later used to interpolate the colors and create the roughness and the "normal map" for the crust. It's very simple, but the result is quite what I was looking for.
Obviously I was not really interested in a hyper-realistic look, but if you want to see someone do that in blender, you can find them here.

Interpolating the color based on a noise map, sampled in object XZ coordinates.
For the base, I had to do a little more work: I wanted to create a "wavy" texture for the tomato sauce, then overlay another noise map to create some "mozzarella islands". I also went for lightly extruding the mozzarella upwards to give it a more three-dimensional look, but later had to reduce this effect to avoid it clipping through the toppings.
What could I have done better? Maybe make it a little more "oily" or simply make the sauce reflect the light a little bit more, but I was already projected onto the next phase at this point.
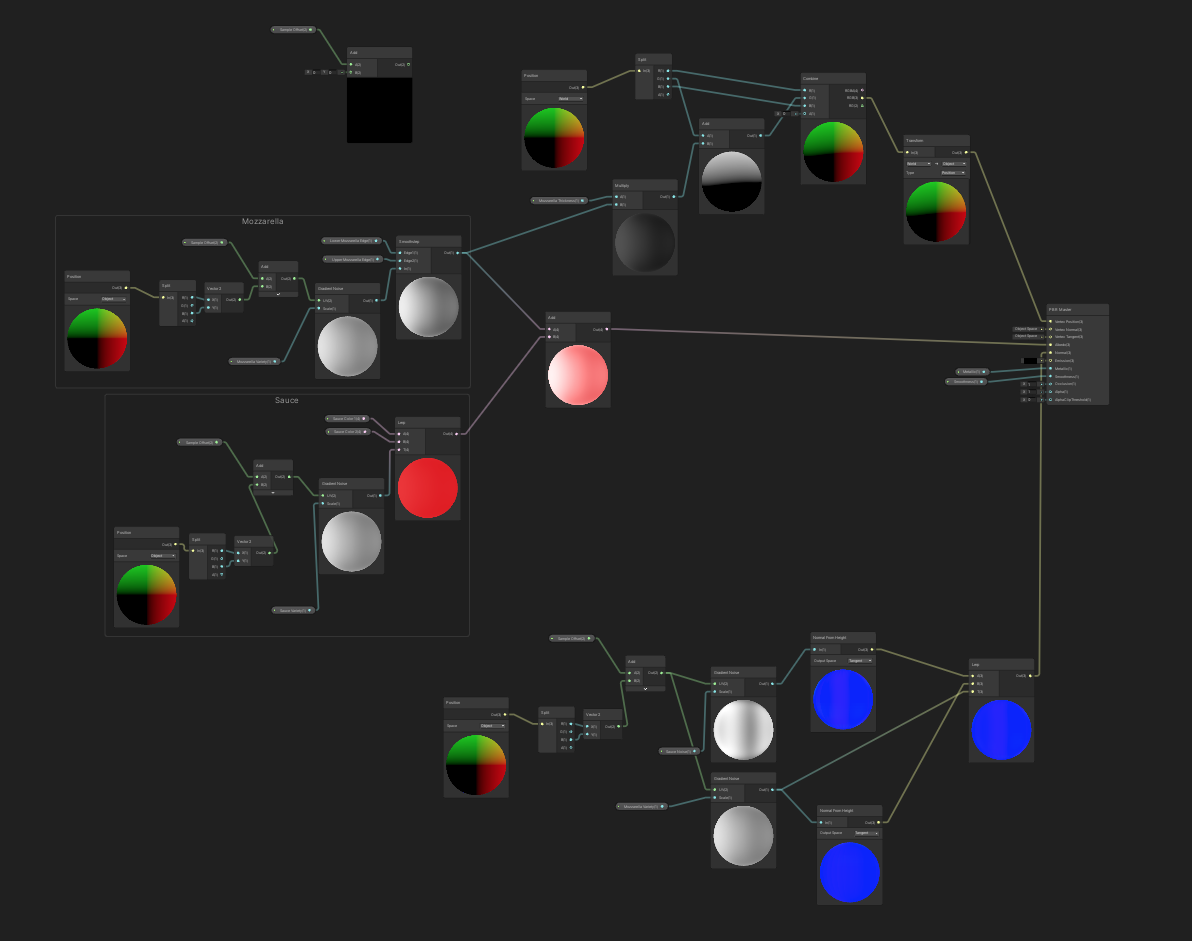
The final (simple) sauce+mozzarella shader.
The toppings:
I'm going to be honest: I was planning to add a lot more toppings to the "game", but I didn't want to make the more complex models. Sometimes I am this lazy, but I am so happy with the result that I am going to condone myself for bailing on olives, fresh tomatoes and a few others.
I fortunately have a few tricks up my sleeve, so the making of the 3D models for the toppings was pretty easy. I settled for pepperoni, sausage, mushrooms, onions and fries. They might not be my first choice when it comes to my pizza (mainly because I don't eat meat) but they were quite popular in the poll I had on Instagram the night before. And they were also the easiest to model without having to rig a soft body/ragdoll compatible mesh.
I also added pineapple as an Easter egg that can be deployed by clicking on the "I'm feeling lucky" button.
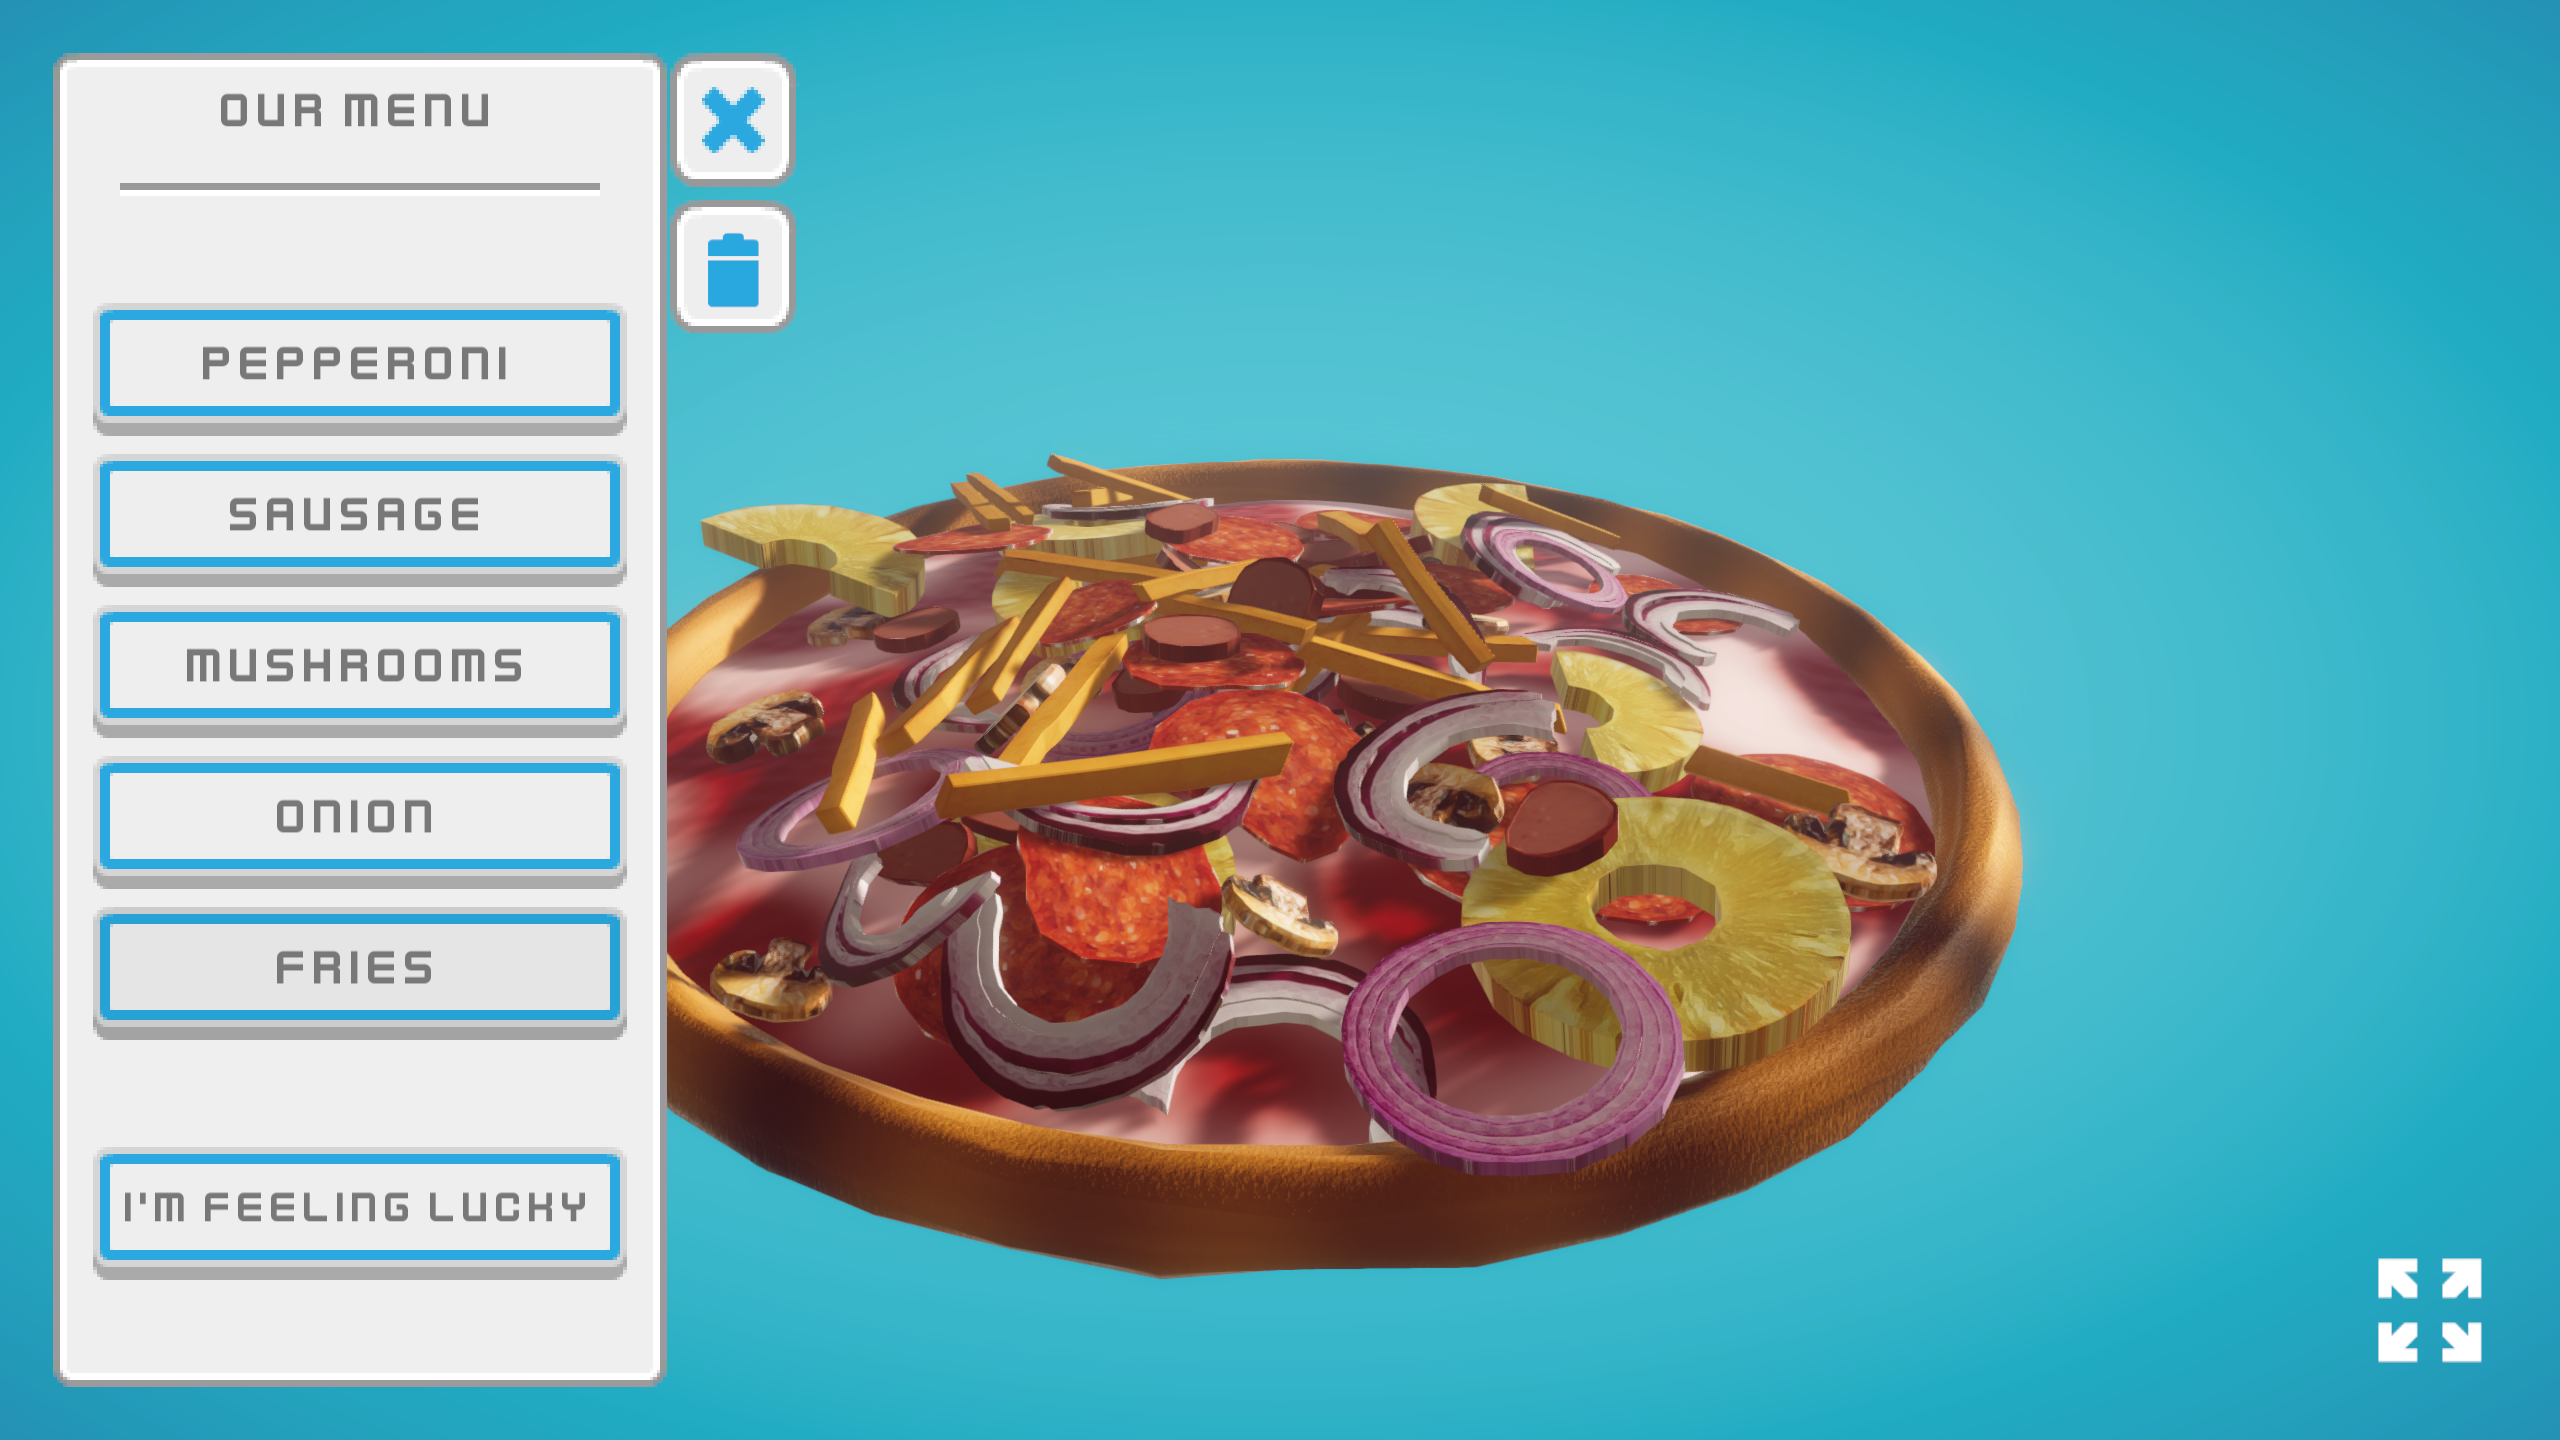
Topping selection in the "game".
Conclusion:
I don't know what to call this project: a game? a tool? an experiment? Anyway, I don't care. It's something I had a lot of fun making and that made me really happy and satisfied once I reached the desired result. I was not let down and my take away is: get outside that comfort zone!
Anyway, if any of this was interesting or even useful to you, feel free to leave a comment and share your thoughts!
Until next time:
Peetah, out –
Leave a comment
Log in with itch.io to leave a comment.